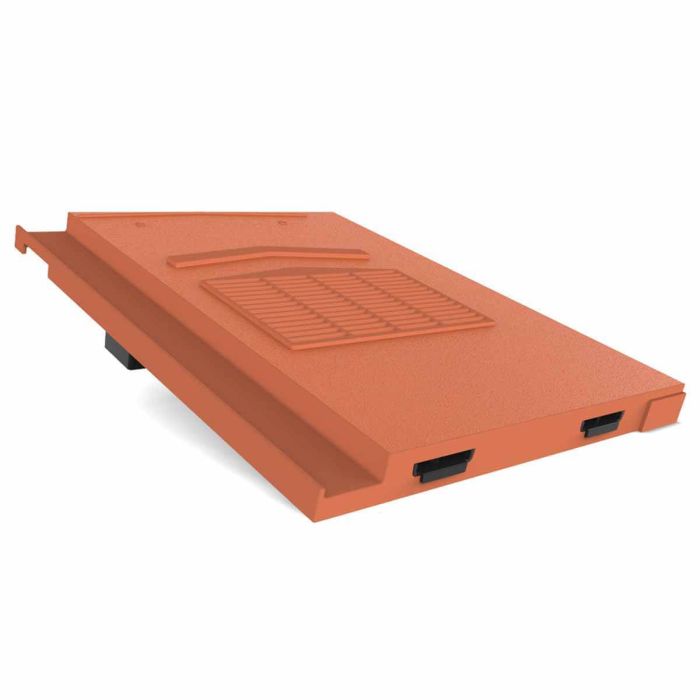
Manthorpe GTV NP Non Profiled Flat Roof Tile Vent Red / Grey / Terracotta Red / Brown
In stock
Lead time confirmed upon order
Don't just compare product prices
Our low delivery rates mean your total order cost is often less than you'd expect. Check delivery rates on the basket page.
Right product for your project?
Talk to an expert. Call us on 01737 763008.
Want to buy in large quantities?
Call us on 01737 763008 to discuss bulk pricing.
FREE Click & Collect
Simply proceed to the checkout and select one of our stores: Dorking (Surrey), Redhill (Surrey), East Grinstead (Sussex) and Esher (Surrey).

Details
Manthorpe GTV NP Non Profiled Flat Roof Tile Vent Red / Grey / Terracotta Red / Brown
The Manthorpe GTV NP Flat Profile InLine Tile Vent is designed to provide a quick and simple solution to the problems of roofspace ventilation and mechanical extraction / soil stack termination through a flat tiled roof.
The vent is designed to replace a single tile and maintain an unbroken appearance to the roofline whether used at high or low level.
The tortured path through the 4mm louvred grill and internal weathering geometry is designed to maintain a 10k m square metres of airflow whilst channelling any water ingress out of the vent and on to the roof.
Features:
- Inline and discreet low profile design
- 4mm louvred flyscreen grille
- Integral sidelock clip to ensure secure fit|
- Fully independently wind tunnel tested
- Base outlet feeds directly into roof space
- Adaptor available separately for mechanical extraction
- Suitable for use down to a 20 degree roof pitch
- Manufacturers Part No: GTVNP
Features
- Inline and discreet low profile design
- 4mm louvred flyscreen grille
- Integral sidelock clip to ensure secure fit
- Profiles suit top all top tile manufacturers
- Fully independently wind tunnel tested
- Base outlet feeds directly into roof space
- Adaptor available for mechanical extraction
- Suitable for use down to a 20 degree roof pitch
Fixing
Application:
1: Prepare the roof tiles in the conventional manner up to the point at which you require the tile ventilator to be positioned
2: Directly below the batten that the vent is to be placed on, mark out a rectangle 170mm x 240mm wide on the underlay in line with the centre of the tile below
Also mark an X in the centre of this rectangle from corner to corner
3: Cut the underlay along the diagonal X lines and fold back the triangular tabs to reveal the spigot opening
Fold the top tab tight up against the batten above it and secure it in position with a staple or tack
If you are fitting Marley Mendip or Redland Grovebury Interlocking Double Pantiles, proceed to step 4a
If you are fitting Redland Renowns, proceed to step 4b
For all other styles within the range proceed to step 5
Installing Marley Mendips or Redland Groveburys: 4a: When installing the Double Pantile profile tile ventilator onto Marley Mendip or Redland Grovebury tiles, remove the blanking profile tabs visible on the inside of the front face
These areas allow the vent to sit flush onto other double pantile profiles but can be easily trimmed away with a knife to allow the vent to conform to the Mendip/Grovebury profile
Installing Redland Renowns: 4b: When installing the Castellated profile tile ventilator on Redland Renown tiles, the two marked tabs on the front face of the vent should be removed by trimming down the marked channels with a knife allowing the tabs to be snapped off the main body
The removal of these tabs will allow the front face to locate within the profile of the Renown tile
5: Insert the vent into the correct position
Make sure the spigot passes fully through the felt so that it is accessible from the loftspace
Also ensure that the tile fits correctly into the interlock of the adjacent tile
6: Nail the vent down into position by perforating the skins over the preformed holes
Clip the vent in place using the tile manufacturers specified clips for the relavent profile
Once fixed, continue tiling around the vent in the normal manner
Technical specification
Airflow
- 10K m square metres per unit
- Minimum roof Pitch: 20 degrees
- Maximum Headlap: 100 mm
- Ventilator Spacings to Achieve Required Vent Area: 5,000m square metres at 2.0m centres
- 10,000m square metres at 1.0m centres
- 25,000m square metres at 0.4m centres
Technical
- Weight: 1.08kg
- Materials Top: PVC / Base: Polypropylene
- Manufacturing: Injection Moulded
